While the budget you need to get into pc gaming is not astronomical, even a cheap gaming PC is more expensive than most modern consoles. We’ve shown that you can build a sub-$500 gaming rig, but what if that’s beyond your budget? Using a combination of new and used parts, you can build a very capable gaming PC for only $350.
So...how exactly do we build a gaming pc for only $350?
The answer to that question is simple! We buy a preowned desktop computer that's several years old and upgrade the main components. Most of the affordable pre-owned desktops you'll find are office computers utilizing the Sandy Bridge, Ivy Bridge, or Haswell platform.
Although these architectures have aged, they still offer adequate performance at a great price. $100 often gets you an i5 2000 or 3000 CPU, 8GB of RAM, and a hard drive all enclosed in a case. Throw in an SSD and a modern video card, and you have yourself a solid gaming computer without breaking the bank!
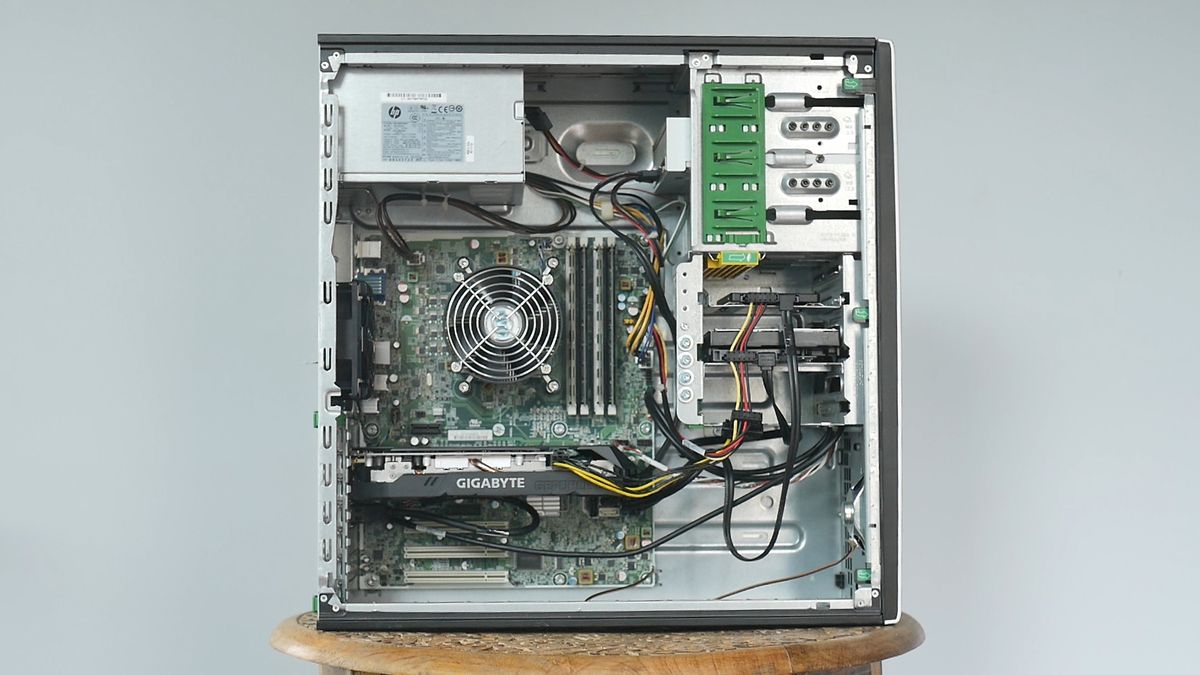
We ordered an HP Compaq Elite 8200 for $145 shipped on eBay. This serves as the base for upgrades, but it is in amazing shape already. Other great alternatives are the Dell Optiplex Series and the Lenovo Thinkcentre series. Just make sure the case is a mini-tower (MT) model if you want to use full-height video cards.
Here are the components we used for our $350 gaming PC. Some came with the HP Compaq Elite 8200 and others we bought separately as upgrades.
The processor is the hyperthreaded quad-core i7 2600 processor - a behemoth during its reign in the early 2010s. It’s been a few years since then, but it can hold its own today even on the toughest titles with the proper expectations. The Core i7-2600 carries a base clock speed of 3.5 GHz with a boost up to 3.9 GHz and a 95W TDP.
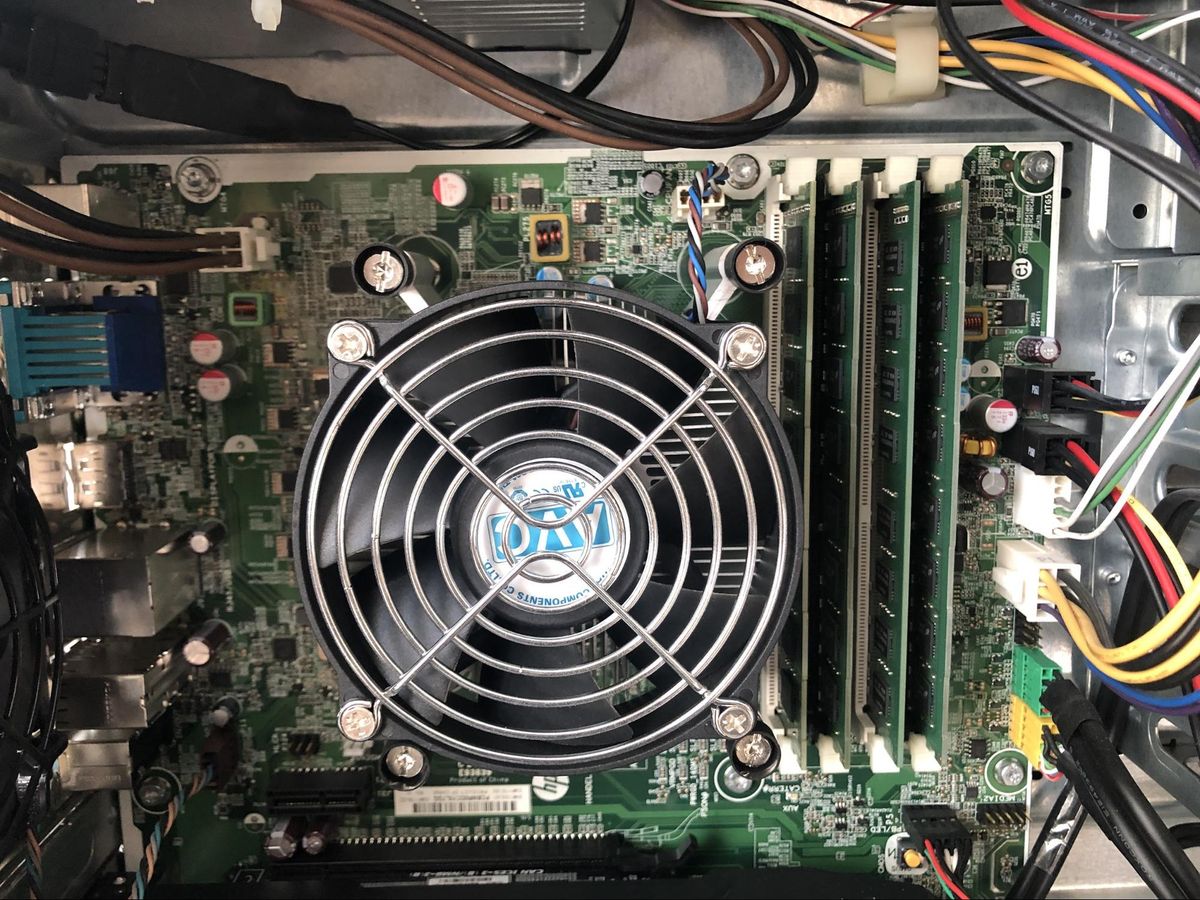
CPU Cooler:OEM HP Compaq Cooler
A no-name, OEM cooler seems like a downside, but the cost saving metric works perfectly for this computer. It adequately cools the i7 processor (as you will see later) and stays quiet enough for an enjoyable PC gaming experience. It has no extra bells and whistles, no RGB, and the heatsink’s copper slug shines as its most prominent feature; but it does its intended job well. The cooler also uses a standard mounting system, so you can upgrade to a better cooler in the future.
Motherboard: Q67 OEM Board
Our pre-built machine comes with an OEM Q67 chipset board which supports up to an i7 2600 processor. It has the basic necessities for a motherboard such as 3 PCI full height slots, a full height PCIe 2.0 x16 slot, a full height PCIe 2.0 x4 slot, and PCIe x1 slot.
Thankfully, there's no noticeable difference between PCIe 2.0 and 3.0 for most video cards under $400 right now - so the lack of USB 3.0 and lack of overclocking are the only major drawbacks. PCIe to USB 3.0 adapters are available for only $10 shipped and our CPU does not support overclocking, so we can circumvent or ignore these downsides.
RAM:4x4 GB DDR3 1600 (16 GB)
Given that Intel has locked the Q67 board, fast and well tuned memory only results in wasted money. The 16GB of RAM the pre-built machine comes with works out wonderfully. Modern games (looking at you Warzone) comfortably use more than 8GB of RAM nowadays so 16GB of memory gives it an edge.
Most pre-built machines do not come with storage, let alone an SSD. Finding a machine with an 850 EVO already inside worked out very well. It is an older model, but the 3D NAND technology provides both solid performance and peace of mind. 250 GB is an awesome starting point for budget gaming. It gives ample room for a few frequently used applications and a couple of games.
CASE:HP OEM CMT Case
The beefy, large CMT case offers lots of room and space for components, including long video cards. It supports the standard ATX form factor, uses a top mounted power supply configuration, and has three bays that can accomodate either optical drives or storage devices.. The mostly metal design is not flimsy and safely houses the components. There is no room for fans in the front nor the top, an unfortunate sacrifice one must make at this price point. Thankfully, a case transplant is possible in the future if necessary.
POWER SUPPLY:320W OEM PSU
The power supply definitely limits the build's upgrade options, but as AMD and NVIDIA build more efficient video cards, power supplies like this model live on. This model is 80+ Bronze certified and pushes 16A on the 12V Rail. That’s enough for up to a 120W video card. It houses (list of connectors here) connectors.
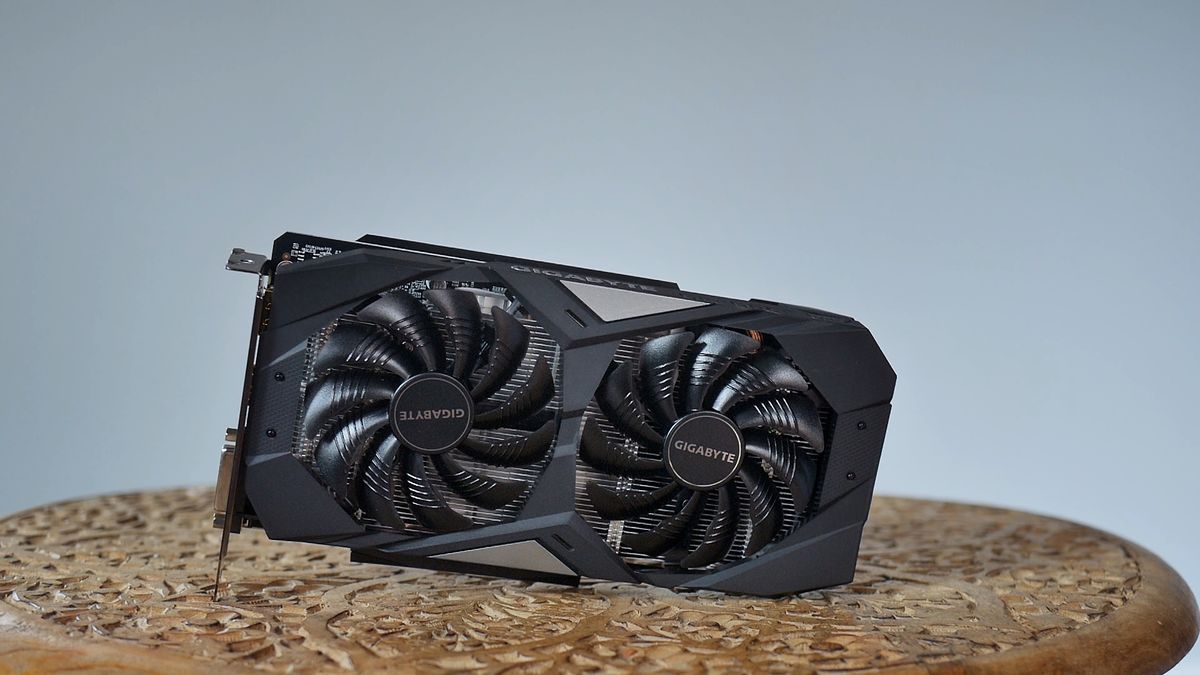
Upgrading the video card is the most important step we took. . We chose the GTX 1650 Super for a number of reasons. It offers phenomenal performance per watt value and will run fine in our system. It uses NVIDIA’s next-to-latest architecture (until Ampere) and it uses NVENC - NVIDIA’s encoder that works great for streaming. It offloads the computing tasks from i7 to the GTX 1650 Super without noticeable performance drops. And lastly, it fits great in our budget.
(Image credit: Tom's Hardware)
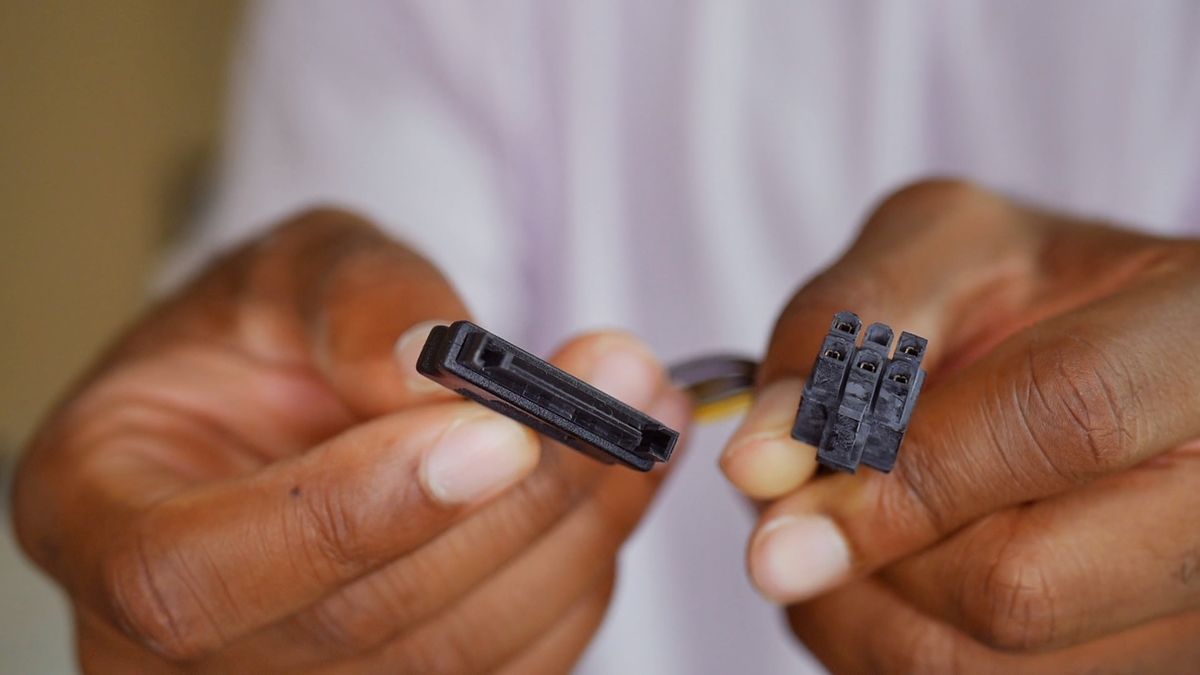
Because the 1650 Super uses a 6-pin port, buying a SATA to 6-pin adapter for $3 is necessary. Although a better power supply is always the ideal option, for the efficient GTX 1650 Super, the adapter will work fine. The 75W from the PCIe slot and the up to 54W (though under 40W is usually the safer range) will adequately power the 1650 Super.
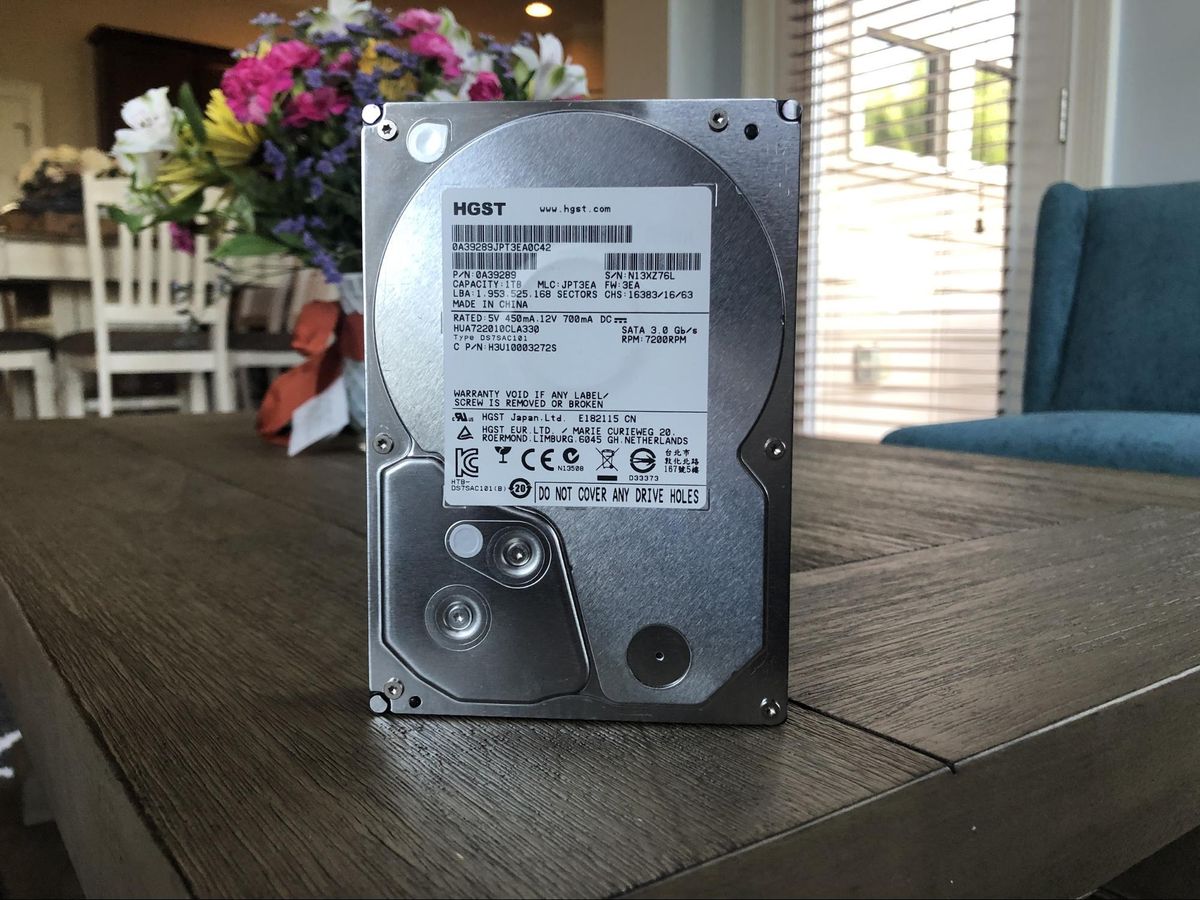
We threw in a 1 TB hard drive for extra space. Mechanical disks are not ideal but there is no denying their storage value. For a machine of this caliber, it fits perfectly. This particular drive is new and has a warranty to ensure reliability.
Part Installation
Because most of the components are already installed, building the rest of the computer won’t take long. Remove the side panel by unscrewing the two screws on the rear and pulling on the flap. Plug one end of the SATA data cable into the motherboard and the other end into the storage device. Take the SATA power cable from the power supply and plug it into the storage device. Slide out a drive bay and place the hard drive in one of them and then slide the sled back in the bay.
Next, take your SATA to 6 pin adapter and insert a SATA power cable from the power supply. Remove the same number of video brackets from the case that are on the video card. For the 1650 Super, it’s two. Insert the card in the top most PCIe slot and you're done. Congrats gamer!
You can use Windows 10 Pro Unactivated for completely free or purchase an inexpensive key
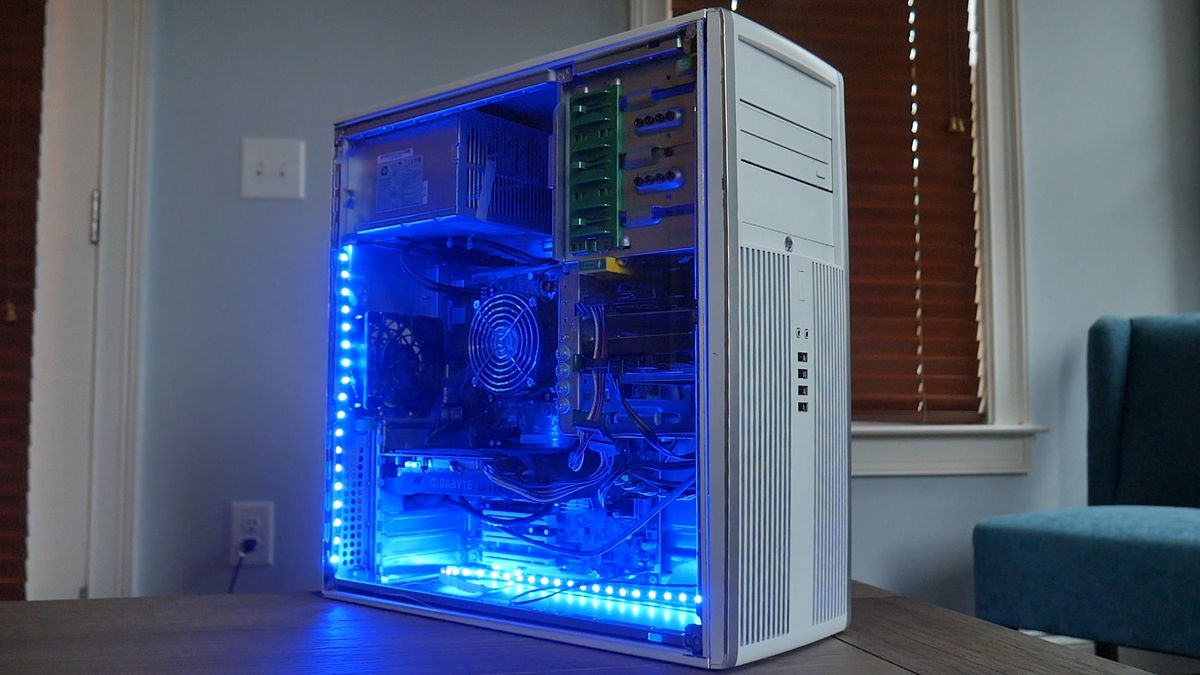
Cosmetic Facelift for the $350 Gaming PC
Building the computer itself is simple and straightforward, but we want to clean the machine and spruce up the build to give it a modern look. If you are satisfied with the current design, you can skip this section and move to “Parts Installation" and save yourself some money and time.
The tools we need for this total to about $42 and are not included in our $350 total. You will need:
18” x 24” OPTIX Clear Acrylic Sheet for $13.50
Clear Side Panel
4 Master Magnet Disc Magnets with a 1” Diameter or Smaller - $2.75 for 6 Magnets
Connects the side panel to the case
Rust-Oleum Painter’s Touch 2X Semi-Gloss White Spray Paint - $4 Each
Gives the case a new color
Superglue (0.14 oz) - $3
Connects the magnets to the side panel
Hobby or Exacto Knife - $4
Cuts the acrylic panel to size
Painter’s Tape (60 yards) - $4
Masks areas of the case for painting
Straight Edge - $1
Cuts straight lines
All the prices are taken from Home Depot.
Firstly, we removed all the motherboard connectors and cleaned the inside of the case with isopropyl alcohol, paper towels and cotton swabs. The case’s original office computer look works well for a sleeper machine, but that is not the intention here. Let’s give it a glossy, white coat. We slipped on the side panel, and masked the removable side panel, the front panel filters, and the HP logos with painter’s tape. Masking can hurt a paint job if rushed so take your time here.
Once masking is finished, shake the Rust-Oleum spray paint can and start painting the top panel, front panel, and back panel. Make sure you are in a well ventilated area like an open garage. Stay 6 to 12 inches away from the workpiece and move in a horizontal fashion and start painting the front panel. Aim for 2-3 light coats for the best results and wait 15 minutes between each coat.
Once the painting is done, we can make the side panel. Measure the length and width of the removable side panel and add markings to the acrylic sheet. With the ruler, draw straight lines resembling these dimensions. With the knife, line up the ruler to the drawn straight lines and make grooves in the acrylic sheet. Bring the sheet to the edge of a table and snap off the grooved section.
Lastly, superglue one disc magnet to each corner of the acrylic sheet (the side without the spray paint). Connect the sheet to the case and you now have a DIY window and a stellar looking computer.
Conclusion
(Image credit: Tom's Hardware)
For less than the cost of some Chromebooks, this $350 gaming PC build provides affordable gaming. No deal hunting is necessary and there is no shortage of pre-owned office computers at similar prices and configurations to the $145 HP . While used components do not have the same guaranteed reliability as brand new components, you save money and fight electronic waste by providing a great home to a functional computer. Modding the system is not necessary, but these pre-built computers are a blank canvas that leaves room for creativity.
There are downsides to this method. For $150 to $200 more, there are modern platforms with phenomenal upgrade options that won’t bottleneck future offerings from NVIDIA and AMD. The proprietary hardware and power supply limitations do not help either. But, if you’re looking for solid immediate performance for yourself, your kids, or a friend then, this is an option worth looking into.
How to Build a $350 Gaming PC That Can Play AAA Games
Reviewed by Ansh Goel
on
September 21, 2020
Rating: 5


 Reviewed by Ansh Goel
on
September 21, 2020
Rating:
Reviewed by Ansh Goel
on
September 21, 2020
Rating:


No comments: